This guide will teach you step by step to make a Discord Bot that does some cool commands and stays online 24/7! This process is pretty easy for anyone to understand!
Before you start…
This guide sounds like a mouthful, but it’s really simple and allows anyone to create a bot! You don’t need to pay anything either since everything is totally free! You will also learn some JavaScript along the way! You will require:
- A working Computer (This cannot be done on a mobile device)
- A Verified Discord Account
- Some basic JavaScript knowledge. (Take a look at some coding tutorials!)
If you have all of that, your all set! Let’s start by creating the bot!
Section I – Creating a Discord Bot
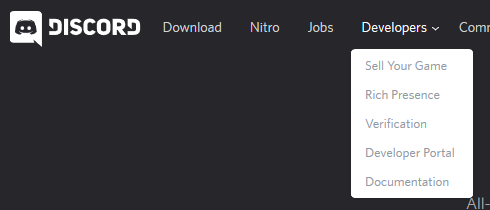
This first part is the easiest by far! First you must navigate to the discord website at https://discordapp.com/! Once your there, head to the developer portal by clicking Developers and then Developer Portal!
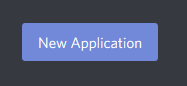
You’ll be brung to this Applications Page, click the new Application Button which should be in reach! After clicking it, put in a name! I’ll call this one Tutorial Bot for sake of the tutorial.

Once you’ve created it you’ll be brung to a whole new page! Note the app icon won’t actually show on the bot. Speaking of that, let’s create the bot! In the section on the left, click the Bot button! Now click the newly made “Add Bot” button! This’ll turn your application into a bot! You’ll see a lot of buttons!

You can see your bot already has a discord tag, at this point you can add an icon by clicking on that discord icon! Now that the bot is set up, keep this open as you will need two important things that you’ll need to invite the bot and to start it up in the code!
Section II – Invite the bot to a test server
Now that our bot is created, we can invite it! We’ll create a test server to test some stuff! Open discord in your browser or start up the discord app if you haven’t already, make a new server by clicking that plus button. If you don’t know how to get into the discord app in your browser just click the “Open” button on the discord website!
Now that you’ve made a new test server, it’s time to invite the bot! You’ll have to make a link yourself, heres a template:
https://discordapp.com/oauth2/authorize?client_id=CLIENT_ID&scope=bot&permissions=PERMISSIONS
Replace CLIENT_ID with the client id from your bot! Go back to “General Information” and click the copy button and paste that into the link. Then Replace PERMISSIONS with the permissions integer. You can find one back in the bot section and scroll down. I’d recommend checking Administrator so you can have access to all features, but if you want to just use some features then just click the ones you want. Now that your link is ready, press Enter!

Now just invite the bot like you would with any bot! Select the server and make it the server you just created or whatever server you plan to test in.
Click Authorize, do the Captcha, and then your bot has been added! Currently your bot is offline though, time to add some code!
Section III – Setup the coding enviorment
In this tutorial we will be using Glitch.com, it’s completely free and quite useful in creating bots! It also gives you 200MB to play around with data and there is friendly staff if you get stuck.
Head over to https://glitch.com/ and sign in! You have to use an existing account like Google, Facebook, Email or Github to sign in.

Click the New Project button, then you’ll want to click “hello-express” as we’ll be using the Node.js plugin. We can also add the packages we need later.
Now that you’ve created a project you should see something like this:

It looks like a lot, lets keep going.

There are a lot of unneeded files however, delete the client.js, style.css and index.html files as we do not need those. Then change the README to whatever you want. To delete a file, just click on it, then click the arrow and click delete.
Now in the “server.js” file, replace all the code with this:
const http = require('http');
const express = require('express');
const app = express();
var server = require('http').createServer(app);
app.get("/", (request, response) => {
  console.log(Date.now() + " Ping Received");
  response.sendStatus(200);
});
const listener = server.listen(process.env.PORT, function() {
  console.log('Your app is listening on port ' + listener.address().port);
});
setInterval(() => {
  http.get(`http://${process.env.PROJECT_DOMAIN}.glitch.me/`);
}, 280000);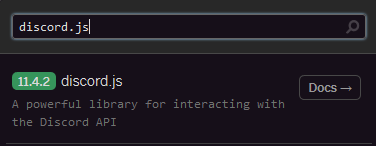
It’s a little more efficient and sets up a port. We will have to install discord.js next. Go into package.json and click the Add Package button, search up discord.js and just click it. It will now install discord.js. I’d also open up Tools > Logs, so you can see whats going on. Now that discord.js is installed. We can start to add the code for this bot!
Section IV – Basic Bot Code
Now everything is installed. We can start by adding some bot code! Let’s start by putting in our secret token back in the developer portal. It’s in the bot section. Warning: Anyone who has this token has access to make your bot do different things! Don’t share it with anyone! Go into your .env file and replace the SECRET and MADEWITH code with TOKEN=

Then Copy the token from the developer portal and paste it right after the equal sign and no semicolons!
Go back into the server.js file add add these first few lines after all the current code.
const Discord = require('discord.js');
const client = new Discord.Client();
What this does is it gets the Discord library we installed a bit ago and creates a new client. Now we’ll need these two lines after the code you created:
client.on('message', message => {

});
client.on('ready', () => {

});
We have two client functions for when the client is on. One for when the bot sees a new message and the other for when the bot is ready. We’ll need one more line before we can do anything:
client.login(process.env.TOKEN);The process.env.TOKEN is the token you put in the .env file a bit earlier. One cool thing about .env files is that no one can see inside it unless you have given them permission to edit your program! If you go back to the discord app in the server. The bot has been turned on! It does nothing at the moment but it’s better than nothing!
Let’s put a console.log in both functions
client.on('message', message => {
  console.log("\"" + message + "\" has been posted by " + message.author.id);
});
client.on('ready', () => {
  console.log(client.user.username + " is ready!");
});
So now every time someone posts a message, the bot will post it to logs and it will show the message and the creator. It will also post to logs when the bot is turned on! At this point your code might look something like this:
app.use(express.static('public'));
app.get('/', function(request, response) {
  response.sendFile(__dirname + '/views/index.html');
});
const listener = app.listen(process.env.PORT, function() {
  console.log('Your app is listening on port ' + listener.address().port);
});

const Discord = require('discord.js');
const client = new Discord.Client();

client.on('message', message => {
  console.log("\"" + message + "\" has been posted by " + message.author.username);
});
client.on('ready', () => {
  console.log(client.user.username + " is ready!");
});
client.login(process.env.TOKEN);
Try typing in some messages! Speaking of messages, let’s set up a basic command! How about a coin flipping command?
After the console.log line in the message function, let’s add an if statement to check for a prefix.
  var Message = message.toString();
  if(Message.startsWith("!")){
    var fullCmd = Message.slice(1);
    if(fullCmd.startsWith("flip")){
       coinFlipCommand(message);
    }
  }
First we check if the message starts with an !. If so it will create a new variable called fullCmd which is equal to message, without the first letter (Which in that case would be !). Then we check if the full command starts with "flip", and if so then we would call our flip function which doesn’t exist yet. So let’s create one!
Go before the message function but after the client variables and create a function called coinFlipCommand();
var coinFlipCommand = function(message){
    //command here
};
Then we’ll call the function back in that if statement
if(fullCmd.startsWith("flip")){
   coinFlipCommand(message);
}
You might have noticed that we have a parameter called message, this gets the message variable so we can send a message back in the function. To send a message back, go into the function and you would use:
message.channel.send();But since it’s a coin flip command, we’ll need to decide if the coin lands on heads or tails.
  var coinside = Math.floor(Math.random()*2);
  if(coinside === 1){
    message.channel.send("Your coin landed on Tails!");
  }
  else{
    message.channel.send("Your coin landed on Heads!");
  }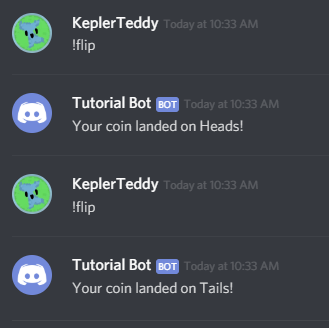
Make sure those lines are in the function. If your project seems to have no errors. Go ahead and type in !flip! If the code was written correctly, the bot will either tell you Heads or Tails! If you look back in the function, Programming starts at 0, so that’s why we used 1 instead of 2 in our if statement! Let’s just set up one more thing and your basic discord bot is done!
Section V: Setting up the 24/7 uptime
Glitch projects will shut down if nothing is looking at it after 5 minutes, so we’ll need something free to ping the project so it stays up! Thankfully Uptimerobot exists! It’s useful, you can have up to 50 pingers without having to pay anything and Glitch suggests it themselves!
Head over to https://uptimerobot.com/ and create an account! Then log in with it and you’ll be brung to the dashboard! You’ll want to create something that’s called a Monitor. Click the “Add New Monitor” button! Click the Monitor Type dropdown and select “HTTP(s)”, put a nice name such as “Tutorial Bot Pinger”. For the url, go back to your Glitch project and click Show App, put it in a new window and then grab the URL when it’s loaded! Don’t worry about the error there, it’s just the HTML things that we deleted, and no one will actually see the page. It also won’t stop our bot unlike some errors which you may discover in the future.
Go back to the Uptimerobot on where your setting up your Monitor. Paste the URL on where the URL box is and leave the monitoring interval at 5 minutes. You’ll also want to check the email that you’ve attached so you can get emails if your Monitor is down. Don’t worry about the advanced settings. Click Done and wait just a minute to see if it works! Reload the page and if it says “Monitor Up”, then you’ve successfully set it up! Try closing the tab of your glitch project, wait a few minutes, play with it in discord, and see if it still works! The finished code is right here:
const http = require('http');
const express = require('express');
const app = express();
var server = require('http').createServer(app);
app.get("/", (request, response) => {
  console.log(Date.now() + " Ping Received");
  response.sendStatus(200);
});
const listener = server.listen(process.env.PORT, function() {
  console.log('Your app is listening on port ' + listener.address().port);
});
setInterval(() => {
  http.get(`http://${process.env.PROJECT_DOMAIN}.glitch.me/`);
}, 280000);

const Discord = require('discord.js');
const client = new Discord.Client();

var coinFlipCommand = function(message){
  var coinside = Math.floor(Math.random()*2);
  if(coinside === 1){
    message.channel.send("Your coin landed on Tails!");
  }
  else{
    message.channel.send("Your coin landed on Heads!");
  }
};

client.on('message', message => {
  console.log("\"" + message + "\" has been posted by " + message.author.username);
  var Message = message.toString();
  if(Message.startsWith("!")){
    var fullCmd = Message.slice(1);
    if(fullCmd.startsWith("flip")){
       coinFlipCommand(message);
    }
  }
});
client.on('ready', () => {
  console.log(client.user.username + " is ready!");
});
client.login(process.env.TOKEN);
Section VI: Grow your bot!
After your coin flip command, there is much more you can do! You could add more commands like a dice roll! Just copy and paste the if statement and make another function! You can look at the discord.js documentation!
In the future I’ll have more posts and video tutorials on how to make certain things for your bot, such as:
- Make older commands work better
- Turn your bot into a Music Bot
- Make your bot store data
- Bring your bot to Discord Bot List
- Turn your bot into a leveling bot
- Turn your bot into an RPG!
You can do many things yourself too! If you ever get stuck, Google is your best friend! You can even collab with others to make even better bots! Keep on coding and you’ll get better!
Thanks for checking out this tutorial! If you want you can check out my bot The Kepler Bot: The Kepler Bot | Discord Bots
Or Subscribe to my YouTube Channel: https://bit.ly/2KiMqZ5
That’s all for now!
